January's Bag
This was a fun bag to work on for my first project of the year!
A few weeks before Christmas, a friend asked me to make a special 'hospital bag' for her daughter, who is expecting her third baby in a few weeks. She wanted a tote bag for carrying diapers, blankets and other necessities to and from the hospital after the baby is born. And it had to have the baby's 'code name', January, embroidered on it. We discussed the size and style of the bag over lunch, but the colors and designs were left up to me and my imagination.
Hoping to be inspired by the fabric, I began by reviewing my stash for suitable fabrics, looking for some kind of theme that reflected 'January' and 'baby'.
How lucky was I to find two snowflake fabrics in pastel pink and blue that complemented each other so nicely? Both fabrics have been in my stash for years and I had just enough of each color to make the bag.
I decided to pick up on the snowflake theme by adding an embroidered applique design along with the name.
Here is a close-up of the embroidery on the pink snowflake fabric, done in blue thread to coordinate with the blue snowflake fabric:
The snowflake is a free applique design from Planet Applique. I added the text using 4D Embroidery software's Curlew font.
The design of the bag is a simple tote with boxed corners, finished size about 13 inches wide by 18 inches high by 4 inches deep. To help support the bottom of the bag, I used the blue snowflake fabric to make a sleeve and covered a piece of scrap mat board, cut to size. When the pink side is facing out, the support matches the lining; if the blue side faces out, it makes a sweet contrast.
Here is a close-up of the embroidery on the blue snowflake fabric:
To construct the bag, I essentially made two individual bags, folded vertically on one side with a seam along the other and each bottom. The embroidery placement was determined before anything else. After both versions of the design were stitched out, I attached the handles to the top of one side, then joined the two tops to form one large rectangle. The side and bottom seams were stitched, with an opening left at the bottom of the blue side for turning right side out after the corners were boxed. On the right side, the top edge was pressed and topstitched about 1 inch from the edge, both as a design detail and to help secure the straps.
After the tote bag was finished, I was cleaning up my sewing area and a bundle of diaper fabric caught my eye. I'd bought several yards of it a while ago after making some burp cloths from purchased cloth diapers.
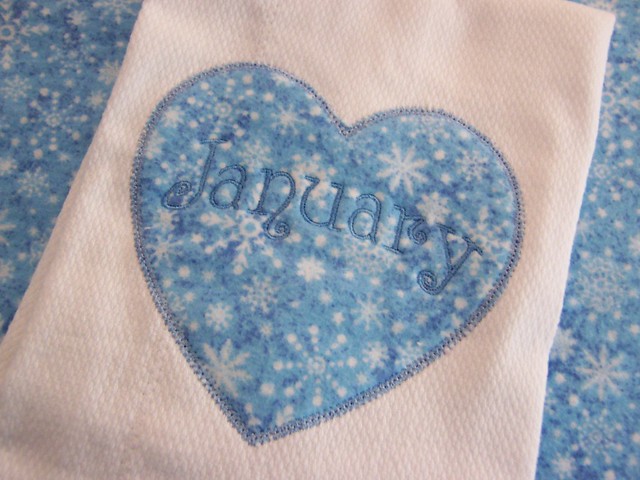
Wouldn't it be nice, I thought, to make a burp cloth for January? I found some snowflake flannel in a pretty blue color at JoAnn Fabrics, and using the same font as on the tote bag, I stitched it on top of a heart shaped applique, a free design from Five Star Fonts.
I followed the instructions in Five Star Fonts' free Banded Burp Cloth tutorial to make this burp cloth, folding my diaper fabric in thirds to look like a purchased cloth diaper. I cut mine a few inches longer and used the serger to join the interior seams.
If I make more burp cloths I think I would tweak the size and order of construction ... but that depends on feedback I get from the moms.
Here's a closer look at the heart applique and embroidery:


Comments
Post a Comment