A New Pair of Beds for Keli and Penny
Keli already had a Port A Crate for sleeping downstairs; we bought that for her about 4 years ago when we traveled to Florida for vacation. I tried to find a matching crate for Penny, but could not find a solid black crate so had to settle for a brown version. For their travel crates, I made them matching cushions out of 4 inch thick Nu Foam, cut to size and covered in fleece. They are lightweight and easy to move around the house.
For night time, Keli had a black wire crate upstairs in our bedroom, and finding a similar crate for Penny was easy. But finding cushions to fit inside the wire crates was just about impossible.

I'd have to make two new beds. When I examined Keli's bed more closely, I discovered it was basically a gusseted pillowcase with a zipper, filled with stuffing and cedar chips. Not too difficult to duplicate!
Eventually, I found a pair of pillows at JoAnn Fabric - Soft-'n-Crafty Decorator's Choice Sham-size bed pillows sold in a 2-pack, each one measures 20x28x2 inches and they're made of the same materials as Keli's original dog bed (without the cedar chips). I probably used a 40% coupon and/or Creative Cash to pay for them so they were relatively inexpensive. They are stuffed with poly-fil, are washable and have zippered liner covers. Since they were slightly longer and wider than I needed, I planned on removing some of the excess poly-fil and allowing my new covers to be overstuffed as necessary.
The fabric I selected for the new covers is a medium weight denim with paw prints and bones printed on it, purchased from JoAnn Fabric's Red Tag section a while back (probably when it was marked down 50%). It caught my eye one day and without any idea what I would use it for, I came home with just about 2 yards, which was just enough for these two cover with a small remnant leftover for some future project.
Since Keli's old covers already fit her crate, I used one as a pattern to create the covers for the new beds. I measured the length and width of the top from seam to seam, then added 1 inch (for 1/2" seam allowances). Then I measured the zipper section and the boxing strip and added a little extra for seam allowances. At first, I cut rectangles from the new fabric, then I made a curved corner template by tracing a corner of the old cover and then trimmed the new cover pieces.


I folded the cover pieces in half lengthwise and widthwise to find and mark the centers (I just cut a tiny slash in the seam allowance):


The zipper is a nylon zipper from the Home Dec department. I assembled the zipper unit and attached it to the 3" boxing strip:

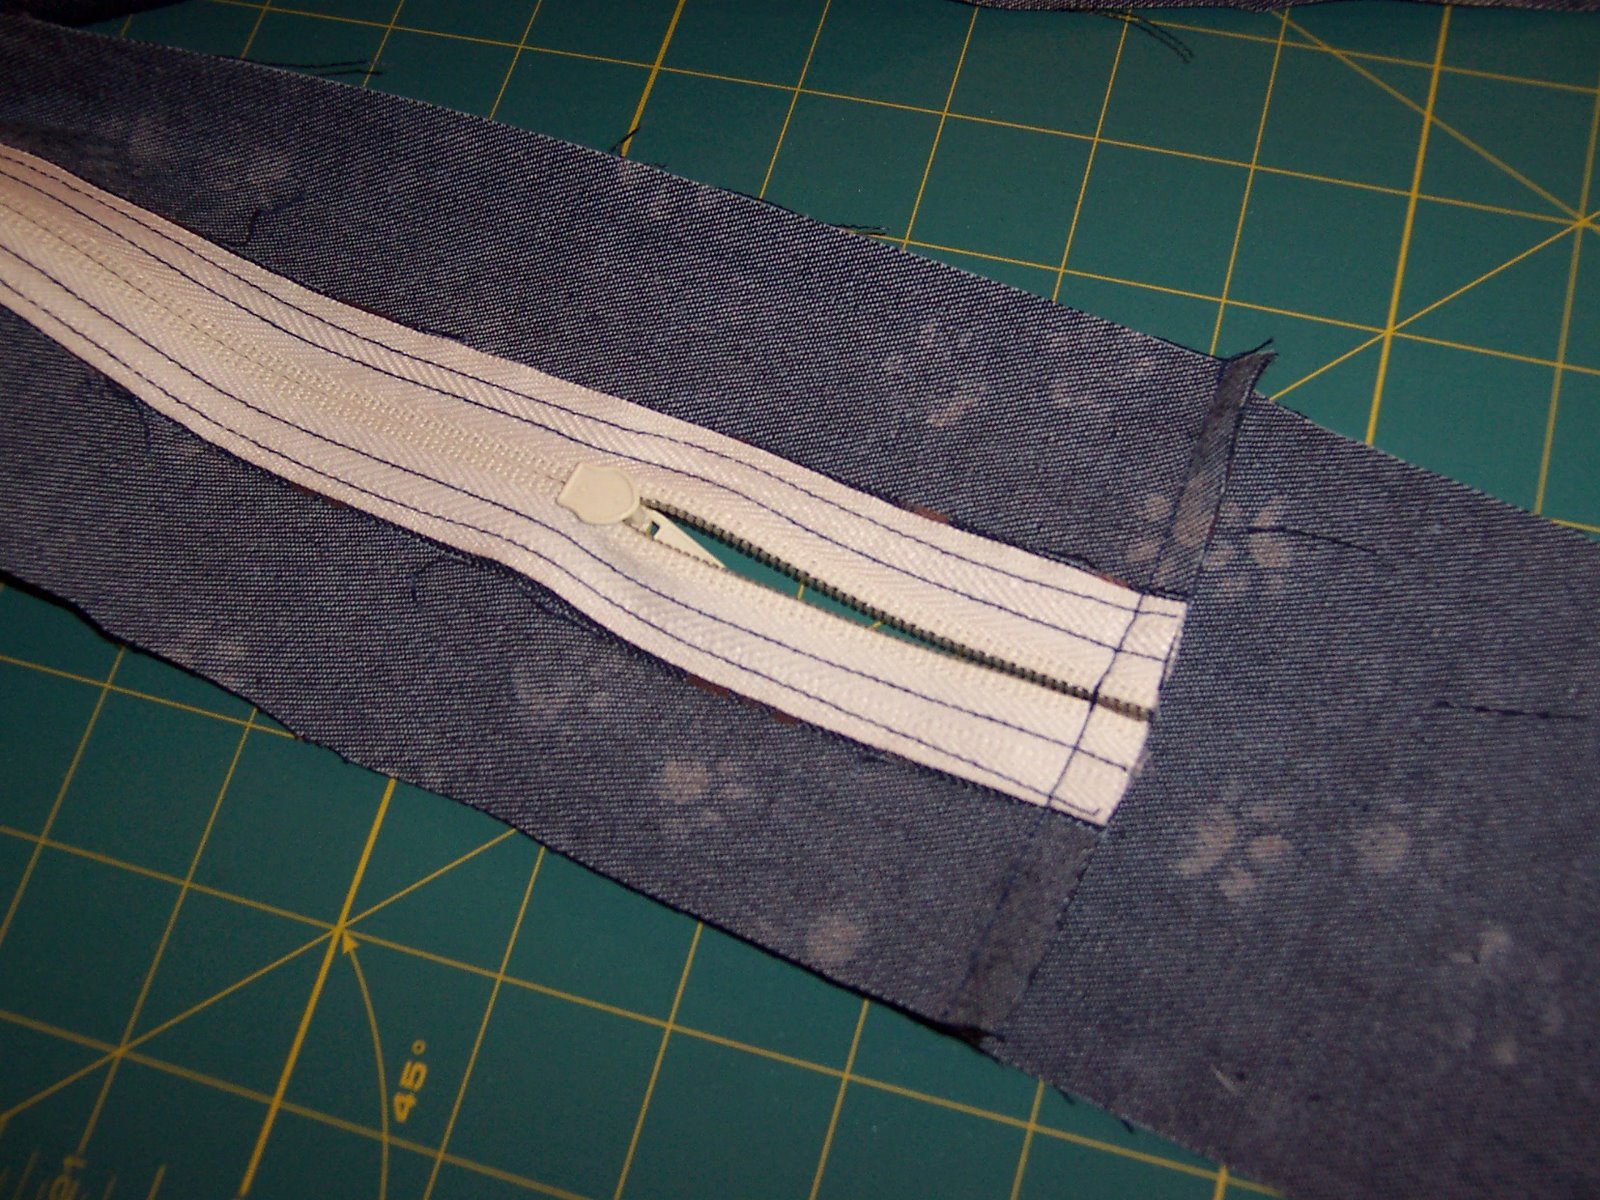
This is the point to decide where the zipper section will be located. I wanted the zipper to ride along the long edge of the pillow, just like the old cover, so I centered my zipper along one long side, pinned the boxing strip to the top piece and stitched with a 1/2" seam allowance:

At the end where the closed zipper stop would be, I folded the excess boxing strip fabric to form a little pocket (this was done while pinning the pieces together, before stitching). This will hide the zipper pull when the zipper is closed: 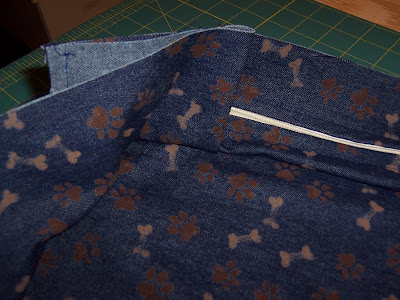
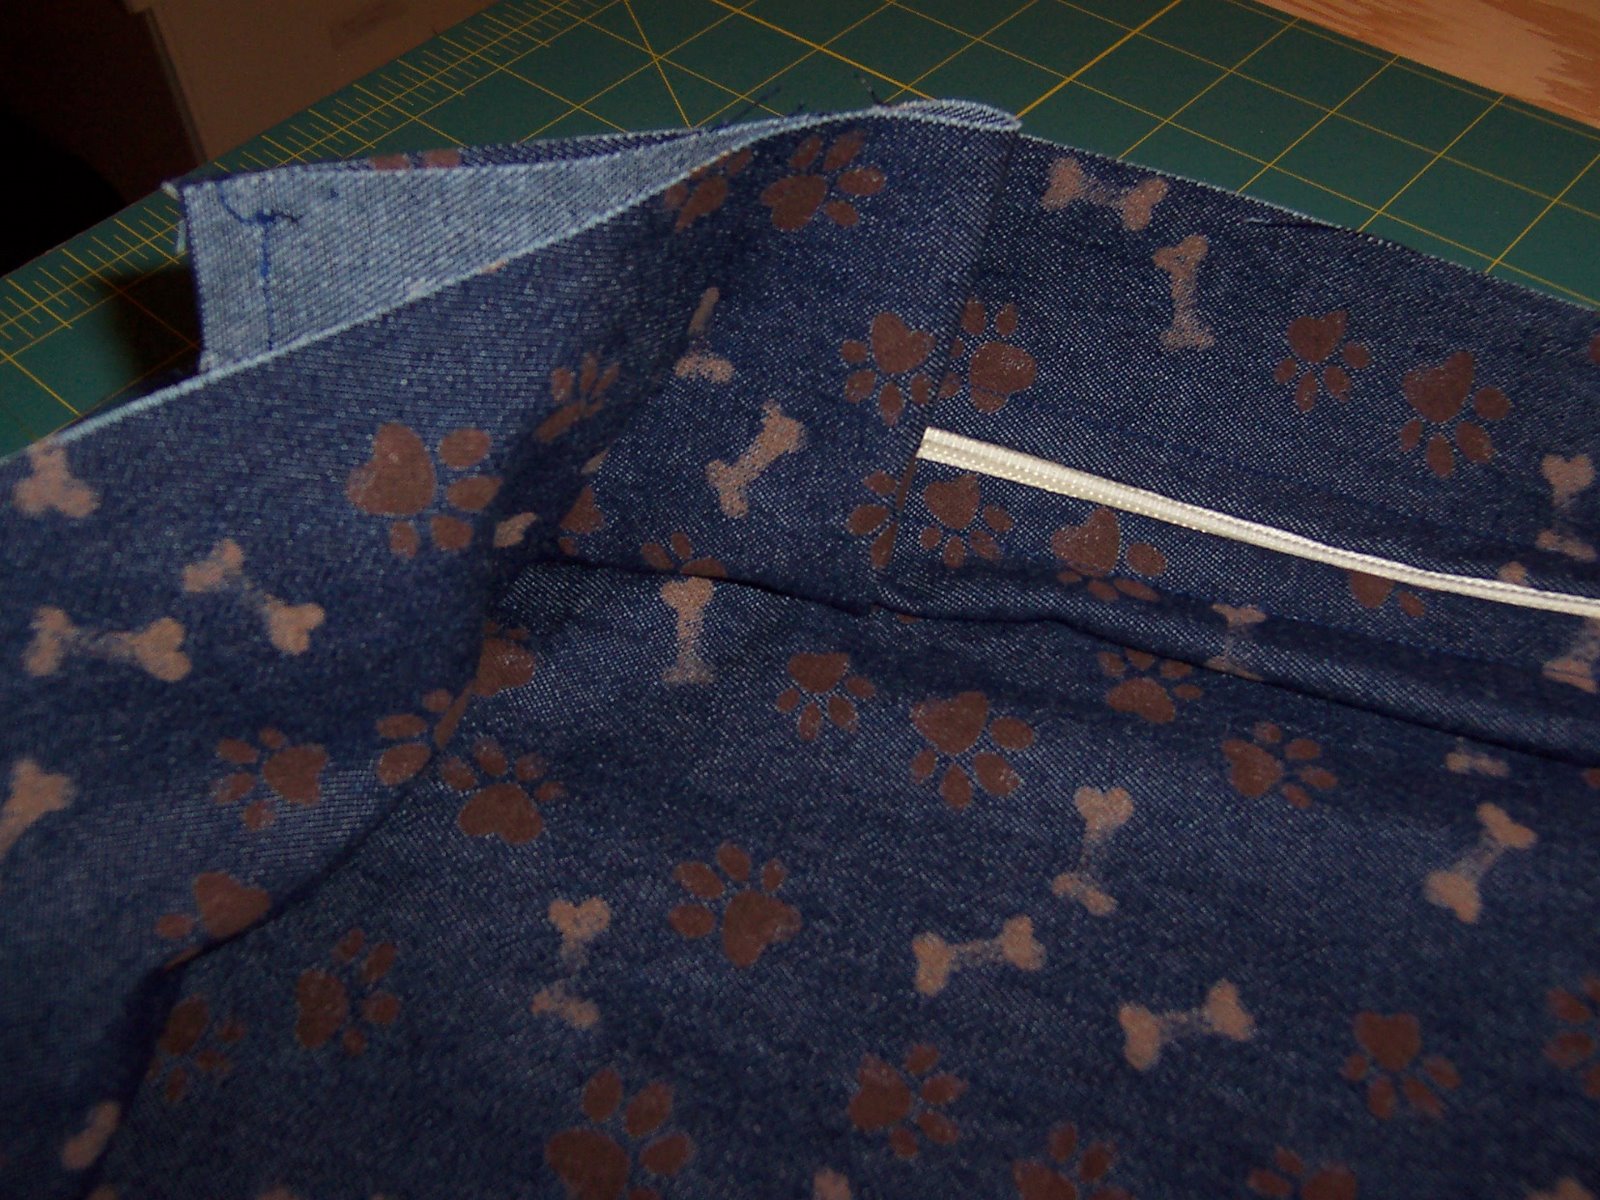
I matched the center markings on the bottom piece in line with the markings on the top piece, stitched the bottom to the boxing strip (leaving the zipper open for turning): 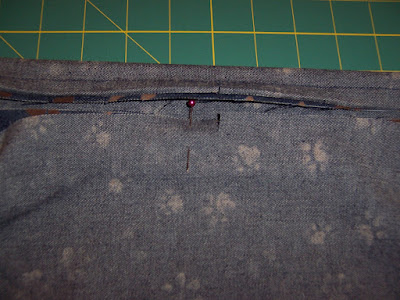

Finished dog bed: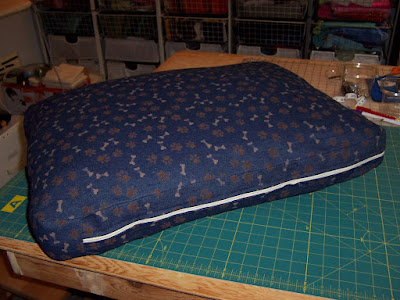

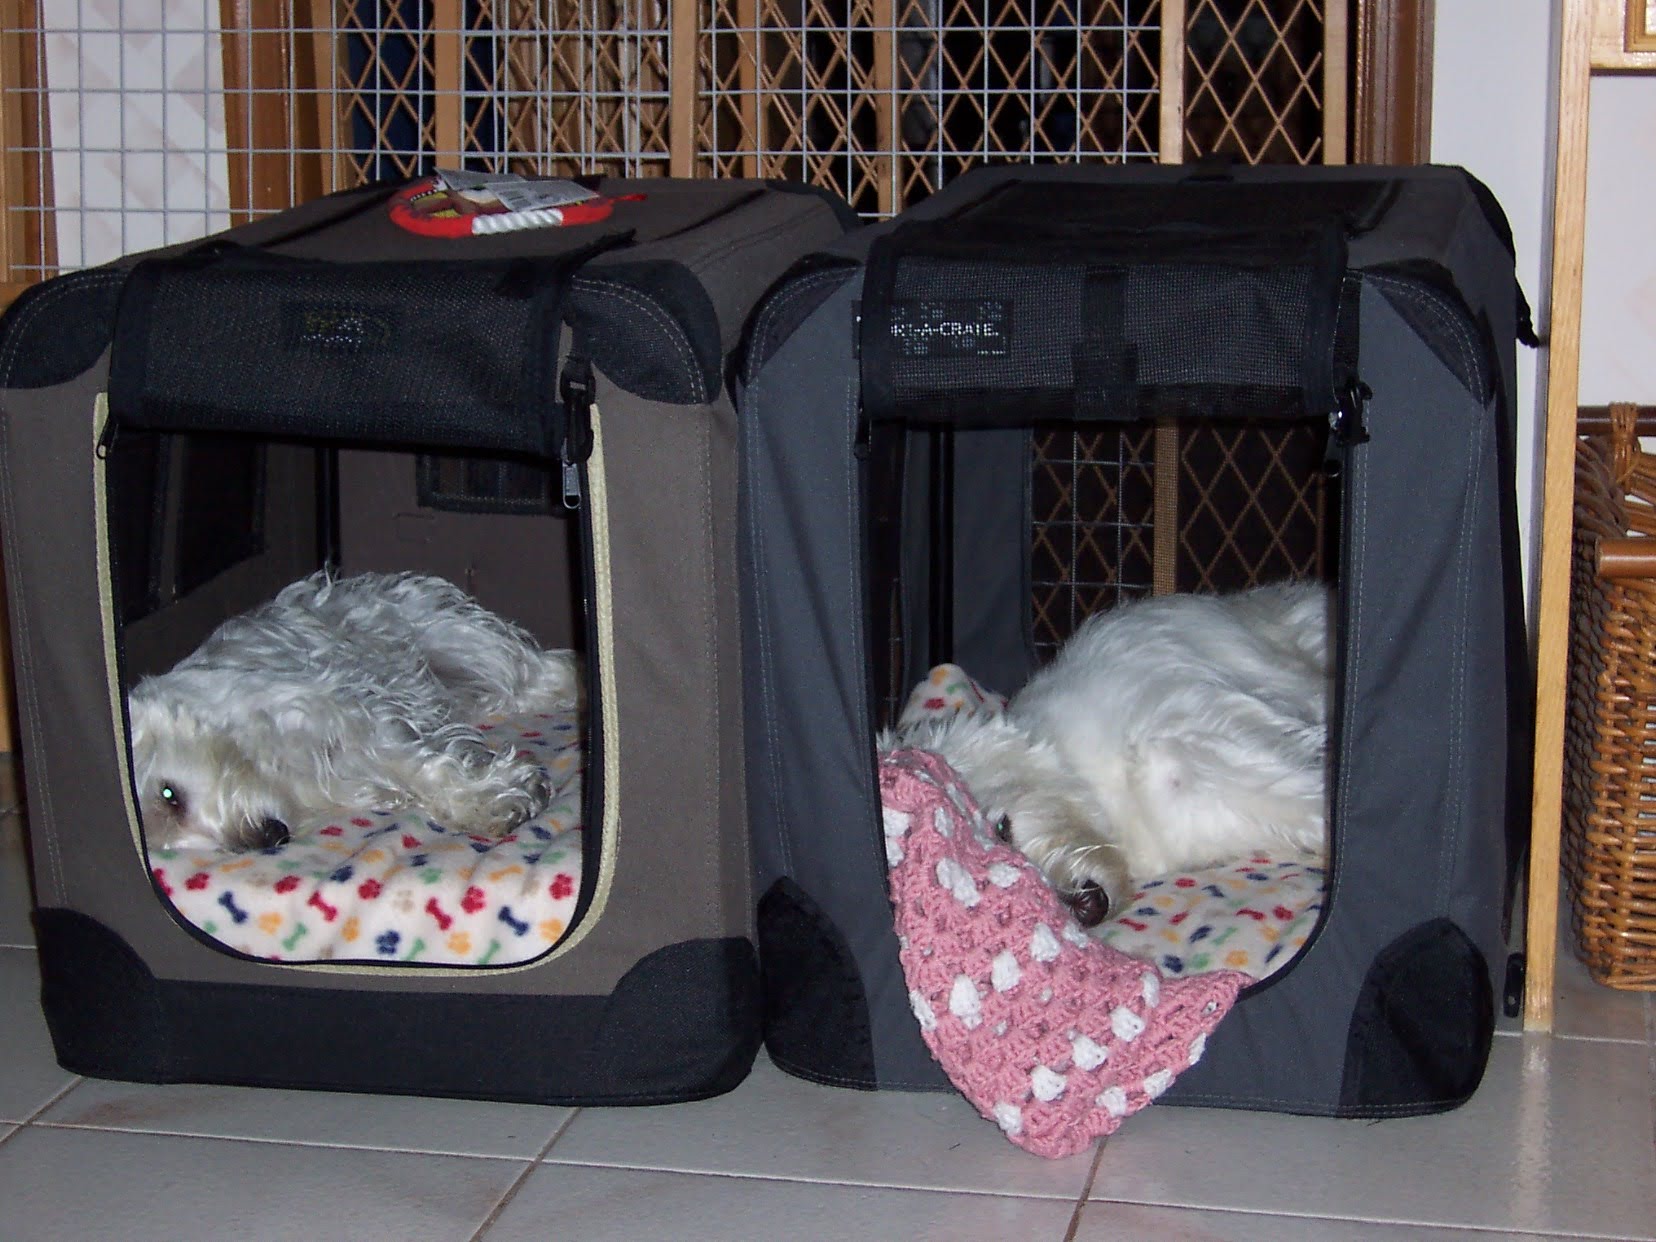
Happy Dogs! Trust me -- that*is* a happy face on Keli (left)
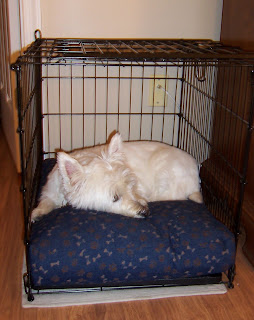
Keli's crate (above, left) is assembled with rods that join the sides at the corners and the top and bottom of the crate have hooks that link onto the sides . . . I've removed the front piece that normally contains the door, since we never lock her in that crate and I was tired of bumping into the open door. Anyway, this also makes it easy for the over-stuffed pillow to spread out and over the front edge of the crate.
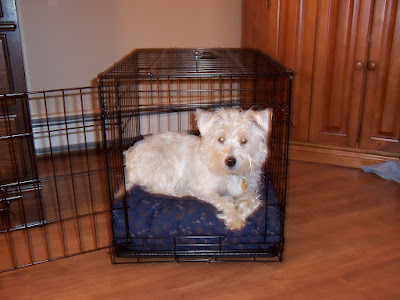
Penny's crate (above, right) is fully assembled and pops and folds up for use, so I can't remove her door. And I didn't think to re-measure Penny's bed before making the second cover . . . I thought they were exactly the same width. So, as a result, her pillow is a little bit squishy inside her crate. But she doesn't seem to mind.
I like that they are color coordinated; even though they don't match *my* bedding, they don't clash with it and they match each other which makes the room feel less cluttered. But now I'm gonna have to make another pair of covers for when this set needs washing . . . I'll have to remember to make Penny's 2 inches narrower. And I'll probably have to embroider their names on them so I'll remember to put them in the right bed. I wonder which fabric I can use next?
More detailed photos of the dog bed construction can be found in my Google photo album, Making a new dog bed cover
Edited: Sep-22-2022 to replace old Picasa photos and broken links


Comments
Post a Comment