Friday, October 31, 2008

Shortcut to My Westie Links

Here on my SewAmazin blog I keep lists of sewing, quilting, embroidery and other crafty links with a Westie theme (updated from time to time):

Completed projects made with a Westie theme or handmade items for my Westies are posted on SewAmazin, too.  Click here to read all my SewAmazin Westie project blog entries.

My other blog, Keli's Korner~The Westie & The Wauzer, is all about Keli and Penny, my two terriers. That's where we post about their adventures. That's also where I'll share photos and stories of my Westie "collections" -- our Christmas ornaments and other figurines, prints, non-sewing related crafts, etc.

As you can imagine, there will be a lot of overlapping between both blogs; anything sewing related will always be posted in SewAmazin and anything Westie-related will always appear in Keli's Korner.


Thursday, October 30, 2008

Miscellaneous Westie Sewing & Craft Links

This page is for miscellaneous Westie and doggie sewing, knitting and crafting links that don't fit into my other lists and will be updated periodically.

Back to the Westie Links Shortcut page

Fabric:

Knitting:

Crafts:

Sewing Patterns for stuffed Westies:


Buttons, Beads, Embellishments:


    Halloween Present

    Halloween Wall-hangingMy sewing room has been possessed by goblins for the past couple of weeks. Let me explain . . .

    Last year, I purchased these machine embroidery designs from EmbroideryLibrary.com. I stitched a sample of the jack-o-lantern appliqué design last October, but didn't quite have a plan for what to do with him when he was done, so he's been in my pile of sample stitch-outs, waiting patiently for me to have an idea. I re-discovered this little jack-o-lantern while cleaning up the sewing room after my t-shirt project.

    It's time to do something with me, he said. Stitch out the black cat and ghost designs and something will inspire you, he said.

    Not wanting to risk offending this ghoul, I pulled out my stash of wool felt and spent an afternoon stitching out the black cat appliqué and ghost designs in coordinating colors. I modified the lettering on the ghost design; originally it had Trick or Treat curved above it and I decided to change it to No Tricks, Just Treats using one of the spooky fonts in 4D Embroidery.

    And now I had 3 coordinating designs without a clue how to put them together in a single project. I put them away for a few days.

    In order to use the ironing board for a different project, I needed to move all the wool felt off of it (cleaning up again) and this time the black felt starting speaking to me.

    Use me for the background, it said. Not a bad idea -- black is one of the colors common to all three design blocks, so I cut a strip of black felt and spaced out the the embroideries in a horizontal row but that didn't seem right. I turned them so they were in a vertical column and the black cat design started to purr. Honest, it really did!

    I couldn't decide how to attach the design blocks to the black background - straight stitching, layered over another piece of felt, or framed in reverse appliqué . . . I tried a few different samples and decided to attach them using a buttonhole stitch. I planned to use this stitch on another project, so needed to practice some more anyway.

    But before I could start sewing the pieces to the background, it growled at me and said it needed embellishment. What now, I asked.

    Free motion stippling with variegated cotton!
    it replied. Well, I've had my Fabric Mover for about 2 months and I've only used it a couple of times. Okay, I thought, I need the practice, the black felt wants some color and I have a spool of Sulky 12wt cotton with oranges, reds and yellows that would look pretty cool.

    The Fabric Mover got a workout last Sunday and I got a chance to play with swirls and stipples and all kinds of scribble-y shapes. Some of them are a bit wonky and scary-looking, but hey, this was a Halloween experiment, after all. And besides, the black felt got the color it demanded, so it's all good!

    When I finally sat down to sew the embroidered squares onto the background, no one complained.

    Not the jack-o-lantern
    Halloween Wall-hanging

    or the ghost
    Halloween Wall-hanging

    or the black cat
    Halloween Wall-hanging

    I'm calling this a wall hanging, even though it doesn't quite feel finished just yet. I'm waiting for whoever is haunting my sewing room to tell me what it needs next. Maybe the felting machine will demand a chance to come out of its box and work a little magic. So this is still a work in progress for now.

    Before the creepy voices started, I was working on some Halloween costumes for Keli and Penny:
    Ghouls just wanna have fun
    I made them very simple neck ruffles -- they are just fabric "donuts" with elastic inserted inside, no pattern used. The hats are based on Butterick B5117, View B, but we left off the brims, because even for a size XS, they were just too much hat for a Westie head. They *hate* stuff on their heads anyway, so less hat was better. I used a remnant of black satin for the top part of the hats and coordinating Halloween cotton fabrics for the accent to match each Westie's neck ruffle.

    When I asked them to try on their new ruffles, Penny thought they looked too plain, so we added some specialty yarn (Bernat Boa in Raven black) stitched on around the edges of the ruffles and base of the hats. Then Keli wanted some bling, but nothing shiny, so I used button pins to attach a couple of bone buttons to the hats. No, they are not Doggie Divas, just Westie Princesses. Well, Keli is the Princess; Penny is more the Court Jester. But I digress . . .

    Finally, we were all happy with the ruffles and hats and decided to take some photos:

    Halloween 2008
    Does anyone else try to make two crazy Westies sit still, sit next to each other while holding a broom and look at the camera and look happy about it without shaking off their hats? Or is it just me?

    Some clearer photos of the ruffles and hats on a much less fidgety model:
    Westie Halloween Westie Halloween
    Westie Halloween
    You can see more of our Westie Howl-a-ween dress-ups and photos over at Keli's Korner: No Tricks, Just Treats or in their SewWestie Flickr Photostream; some of the shots are actually pretty good. All the other outfits were purchased, but I think I can use them as patterns for next year... or maybe Christmas.


    Happy Halloween!

    Monday, October 27, 2008

    Westie Quilt Pattern Links

    I've collected several quilting patterns with Westies or terrier-like dogs (including some Scotties) as the main theme. Even though I'm not a real quilter, someday I plan to sew at least a couple of Westie quilts or wall hangings.

    So, similar to my list of Westie machine embroidery links, I'm starting a page just for quilting patterns I like or have purchased, to help me keep track of my "collection".

    I also have a Westie and doggie fabric collection photo album, updated every once in a while when I find something new.

    Back to the Westie Links Shortcut page


    Quilt Patterns I have made: (updated: 02/16/2010)
    • "Halloween Treats" appliqué quilt from FreePatterns.com; the original design features a Scottie and Chihuahua, but I made a few changes so that they resemble my Westie and Wauzer >> scroll down the linked page to find the pattern; registration/login required to download from this website. Here's my finished version, Westie Halloween Treats: Westie Halloween Treats

    Quilt Patterns I have purchased:

    Quilt Patterns I have spotted on the web: (updated: 02/16/2010)

    ****************************

    This isn't a quilt, but here's a photo of a Westie Christmas tree skirt I made from craft felt, rick-rack, buttons and glue. (This is a scanned image of the original photo, so some of the colors are off).


    Every year when I put up the Westie Christmas tree (in addition to our main Christmas tree), this goes under it and I always think that I should add some hand stitching to it, but now it's about 10 years old and starting to come apart. It should probably be replaced - maybe a quilted skirt is in order.


    Doesn't everyone have a special Christmas tree just for their Westies?


    photo at right taken Christmas 2005 - Keli in the "Westie Wing", otherwise known as the "formal" living room (before it was re-decorated)

    Friday, October 24, 2008

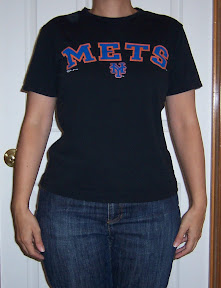
    Finished: Metsie T-Shirt Makeovers

    I finished these t-shirts just about a month ago, just in time to wear for the last game at Shea. I've kind of been avoiding writing about them, since the Mets are not playing this post-season.

    This week I received a letter from the Mets' Ticket Office, offering to keep my post-season deposit towards a ticket plan for 2009 -- yes, apparently they are offering a few partial ticket plans in addition to season tickets next year -- but I chose to receive a refund.

    Anyway - to finally close the book on the 2008 season, I'm sharing my re-modeled Mets t-shirts one more time.

    By the way, these are not makeovers in a sense that the style or look of the t-shirt has been altered -- I didn't change the shape of the neck or arms or turn them into something other than a t-shirt. I just cut them apart and stitched them back together so that they would fit me.

    I should also clarify that I am still somewhat of a beginner at sewing with knits; I've had some success in the past and since these t-shirts didn't fit me before I started hacking at them, I figured I had nothing to lose if they didn't turn out right. The end result is that I have 3 shirts that fit me much better now.

    In my previous post, I shared the results of my first attempt at altering a t-shirt that was an Adult Medium. Here's a reminder of how that one turned out, taken after I finished hemming the bottom:


    The next shirt was an Adult Large; photo on the left is before, on the right is after:


    And last but not least, the one I wore to the final game at Shea, which started out as an Adult Extra Large - before:


    After:

    I decided not to shorten this one, partly so I wouldn't have to hem it and also because I kind of like it a little bit longer, almost tunic length; I also like it better worn with white jeans


    *****************************

    Here's how I altered my t-shirts (click on any image to see it larger):

    Supplies used:
    • Sewing Machine and regular sewing thread to match the shirt
    • Serger and woolly nylon thread to match the shirt
    • Stay Tape (I used Dritz brand)
    • Chalk or other marking pencil/pen
    • General sewing supplies: seam ripper, scissors, pins
    • Oversized t-shirts (the bigger it is the easier it is to alter)
    • Model t-shirt that fits well

    First, I chose a t-shirt I like to wear that fits me well in the shoulder, sleeves, bust, waist and length. In this case I used a t-shirt with stars painted on the front. I pinned the model t-shirt on top of the oversized t-shirt, lining up the star design with the printed Mets logo, matching the center fronts so that the design would be "balanced" on the chest (not too high or too low or off to either side). For the Shea 08 shirt, I did the same thing on the back to make sure it wasn't too high/low or off center; I cut the back and front pieces separately.

    I pinned the shirts together along the shoulders, side seams and armhole seams. I folded the sleeves forward and used marking chalk to trace all around the model t-shirt, along the shoulders, side seams, bottom hem and neckline on the front of the shirt.


    I followed the same procedure for the back of the shirt, lining up the model t-shirt with the front tracings, to draw the back neckline. The traced lines later became my approximate sewing lines.


    Carefully, I cut about 1/2 to 3/4 inch away from the traced sewing lines, trimming around the sleeves and neckband, but not slicing into them.

    I had some "leftover" pieces which I used later to re-attach the neckband and sleeves. The cut-off section of the hem was used to test the stitching on my machines before sewing the t-shirt pieces together.

    Using my regular sewing machine, I stitched Stay Tape to each back shoulder to help keep it from stretching out of shape. Note - this ended up being a little bit itchy when wearing the t-shirt; I might omit this step or find an alternative way to stabilize the shoulder or cover the stay tape in the future.


    Next, I threaded my serger for a 4-thread overlock stitch using woolly nylon thread and stitched the front to the back at the shoulder and side seams, right sides of the t-shirt facing together. I used the chalk tracings as a guideline for sewing the seams. Note: on one of the t-shirts I didn't have 4 spools of woolly nylon and ended up using a 3-thread overlock stitch, which seems to be okay. Time will tell.


    Now it was time to deal with the neckband. The original band was made of a ribbed knit, and still had pieces of the t-shirt attached at the original seam line. Carefully, I used a seam ripper to remove all the threads around the raw edge of the neckband, removing the label and and all remnants of the original shirt. I was left with a circle of ribbing.


    I folded the circle in halves to find the 4 quarters of the neckband and marked them with pins, keeping the original back seam (where the tag used to be) to the back. I did the same for the t-shirt, matching the shoulder seams together to find the center front and back of the neck. With the right sides facing each other, I matched the pin markings in the neckband to the new shoulder seams and marked centers and pinned all around, easing in the fullness where necessary.

    I used the serger to sew the neckband back onto the shirt. The two knits are very forgiving, so I stretched them as I serged to ease in fullness. Note: before serging, I adjusted the knife on the machine so that it was not cutting or trimming any fabric, just overlocking along the edges.


    Next, I needed to adjust the sleeves. I didn't want to have to hem them, so I lined up the top of the model t-shirt sleeve with the top of the makeover shirt and traced the armhole seam and bottom of the sleeve, leaving the sleeve length and hemmed edges intact.


    I cut out the first sleeve near the tracing lines and then used it as a pattern to cut out the other sleeve in a mirror image, marking which was the left and and right so I could re-attach them properly. I serged the bottom edges of each sleeve, being careful to line up the hemmed edges evenly.

    Similar to steps for reattaching the neckband, I matched the side seams of the t-shirt to the bottom seams of the sleeves and the shoulder seams of the t-shirt to the top of each sleeve and pinned them together, easing in the fullness where necessary. I used the serger to sew them together (without trimming).

    The last step (which I forgot to photograph) is to hem the bottom edge, if necessary. My serger converts to do a coverstitch, so that's what I used. I tried to use the special foot attachment for hemming while doing a wide coverstitch, but the t-shirt kept slipping out of the guide on the foot after a few inches. So, instead I just folded up and pinned the hem and coverstitched all the way around, making sure the raw edge of the t-shirt was covered by the bottom threads. If you don't have a coverstitch machine, a double needle on a regular machine should do the same. I also found that regular serger thread or sewing thread worked better for me than woolly nylon did for the coverstitch. But I practiced a *lot* on the t-shirt scraps before hemming my finished shirts.

    Well, that's it -- I'm pretty pleased with how the t-shirts turned out. They fit my shoulders and arms much better now, and they survived both the washer and dryer without coming apart or any other misadventure.

    There is still one shirt I have not attempted to remodel, mainly because there are some holes in it and I'm considering making it a doggie t-shirt or something else. And since finishing these short-sleeved makeovers, I've found a long-sleeve t-shirt from 2007 that is way too big for me to wear. I don't know yet if I'll try to re-size it as a short-sleeve shirt or keep it with long sleeves.

    But that's a project for another day.

    *****************************

    While drafting this post, I discovered a few other T-Shirt Makeover links that might be helpful:

    Friday, October 17, 2008

    Halloween Past

    There isn't too much sewing going on around here lately. I am working on a post to show how I re-modeled my Mets T-shirts, but I've been somewhat uninspired since the last game at Shea.

    Mostly, I've been taking advantage of the warm, dry weather this October to do my fall yard clean-up. I was supposed to do a late-summer clean-up in August and September, but other activities diverted my attention. I'm almost finished now and when I get the photos off the camera I'll share some.

    For now, I'm sharing a bit of a flashback on past Halloween projects, kind of like last year's Autumn Needlework Flashback post.

    I've shown Betty Broomstick before, but I still get a giggle when I put her out for display. She's from a retired Lizzie*Kate kit that I completed in 2006:


    Here is my Witch & Owl Wall Hanging:

    This design is by Carol Emmer and appeared in Holidays Remembered from the Leisure Arts' Christmas Remembered series, Book Five. The verse reads:

    When the Owl & Witch together are seen,
    There's mischief brewing on Hallowe'en.

    In 2001, I re-worked the stitched piece to make it into a quilted wall hanging (photo at right). I originally completed the cross stitching in 1994 and finished it as a simple banner like this (below):


    now:
    And finally, there's the Haunted House from Cross Stitch Quick & Easy magazine's Oct/Nov 1990 issue, which I stitched in 1994. This design calls for glow in the dark blending filaments in the moon, pumpkins and a few other spots.

    Originally, I finished this by mounting it on a padded self-stick board glued to a "wreath" of fabric strips tied to a large brass ring. In 2001, I decided to mount it in the more traditional black frame and glued on resin embellishments.

    before:


    I almost forgot to mention these two Teenie Tweenie samplers from The Sweetheart Tree:


    Teenie Tweenie #10 Pumpkin Patch


    Teenie Tweenie #11 Woodland Splendor.

    I stitched them both in 2000 and cut the mats myself (frames were purchased from American Frame).

    I guess I really haven't stitched too many Halloween decorations . . . last year I made a large fabric pumpkin, but that was machine embroidered.


    I'm working on a couple of simple Halloween pieces for Keli and Penny to wear; when I can bribe those two into modeling them, I'll share those later this month.

    Wednesday, October 15, 2008

    Blog Action Day 2008

    Following up on my previous post for Blog Action Day, here's a way to help some needy school students in my community. I just supported a few classroom projects at public schools in Bergen County, New Jersey via DonorsChoose.org.

    If you contribute, too, we could bring these classroom projects to life. So check it out and see what you think!

    All DonorsChoose.org projects are submitted by public school teachers who seek resources essential to their students' success. Donors can choose from thousands of classroom projects, and then hear back from the classroom they chose to help.

    Please visit my SewAmazin Giving Page at DonorsChoose.org, which I'll monitor every few months and add projects that I think are important. I've added a widget to the SewAmazin sidebar (and embedded below) which links to my Giving Page, for easy access and updates on these projects.


    Blog Action Day 2008 - Poverty

    Last year, the theme for Blog Action Day 2007 was the environment and I participated by posting one of my "green reports", while incorporating the main topic of this blog, which is sewing and crafting. It was easy to come up with this post, since "going green" was something we were already trying to do *and* it has become trendy.

    This year, the theme for Blog Action Day 2008 is poverty, and I've been struggling to find a way to post about this while staying on topic. I still haven't come up with something crafty to write about.

    There are already tons of websites devoted to links for sewing for charity, and I don't want to add another list of the same links. So, instead of a sewing related post, I'll keep it short and simple.

    I'll share a prayer and a question for us to think about . . .

    Here is A Thanksgiving Prayer that I saved from one of the numerous mailings from charitable organizations. I keep it on the refrigerator where I can read it often, usually about once a month.


    Oh, God, when I have food,
    help me to remember the hungry;
    When I have work, help me
    to remember the jobless;
    When I have a warm home,
    help me to remember the homeless;
    When I am without pain,
    help me to remember those who suffer;
    And remembering, help me
    to destroy my complacency
    and bestir my compassion.
    Make me concerned enough
    to help, by word and deed,
    those who cry out
    for what we take for granted.
    ~Samuel F. Pugh

    "For I was hungry and you gave Me food,
    I was thirsty and you gave Me drink.
    I was a stranger and you welcomed Me . . . "
    ~ Matthew 25:35

    Here's the question to ponder:
    What can you and I do today, tomorrow, next week and beyond to help those who are less fortunate, both locally and globally?

    We already donate money to lots of charities; in honor of Blog Action Day, I plan to make additional donations to local food banks (Center for Food Action and Community FoodBank of New Jersey) and other worldwide food relief organizations (such as Heifer International and Oxfam America).

    OK, that's a start . . . hopefully, before next year's Blog Action Day, I'll have something else to report besides monetary donations.


    For more information and ideas, check out The Action Blog


    Related Posts Widget for Blogs by LinkWithin