Reusable Shopping Bags: Adding a pocket & carrying pouch
Last month, I wrote about how I made some reusable fabric shopping/grocery bags from fabric remnants. On some of my bags, I added a pocket for storing my shopping list and coupons. Here's how I did that:
The first decision is how big the pocket should be -- since I'm using scraps, each pocket is a little bit different in size. I just try to make them about 7" wide - or at least wide enough for a shopping list and coupons to fit easily.
On most of my pockets, I cut a piece of fabric 9" wide by 14" long, then fold this in half so that it measures 9"wide by 7" long. I sew along the side seams with a 1/2" seam allowance, then trim the seams and corners and turn it right side out. It should be about 8" wide by 7" high. Then I determine where the pocket should be placed on the bag. I line it up on the outside, trying to center it horizontally about 3 inches down from the top edge. I turn it upside down so the outside of the pocket lies on the right side of the bag, and stitch a 1/2" seam. Then I fold the pocket up into place and press it with steam. Last, I topstitch around the 3 sides, reinforcing around the top. To keep the pockets closed, I added the new fusible Velcro to make a closure on the inside of the pocket. (Sorry for not including photos -- they evaporated during download . . . I'll try to recreate them on the next batch of bags!)
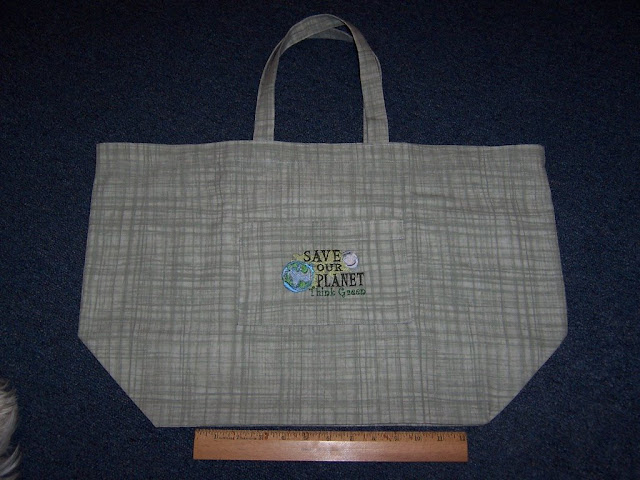
I only put a pocket on some of the bags; if there's a pair of them, I'd probably only use one pocket for my shopping list. I also embroider on some of the pockets, but the embroidery is done before any of the sewing. Here's a sample of a finished bag and pocket:
If I have enough scrap fabric left over, I make a simple zippered pouch for carrying each set of shopping bags. I've been saving clear vinyl packaging from bedding for years; some are quite plain so I reuse them for storing and packing my sewing stuff. Some of them have product names printed on them, so I've been ripping them apart to salvage and re-use the vinyl parts and especially the zippers.
To make the zippered pouch I cut a rectangular piece of fabric large enough to wrap around a pair of finished and folded shopping bags. I apply the recycled zipper to the two short ends. Then, just like making the shopping bags, I fold it in half and serge the side seams (just make sure the zipper is open a few inches). If there's enough scrap fabric, I make a loop about 3/4" wide using the same process as making the bag handles and pin that into the side seam before stitching. Turn it right side out, and the pouch is done!
Why are my bags "green"? Well, besides the fact that the fabrics are all greenish in color, I've used up countless yards of remnants which would have otherwise ended up in the trash. They're cotton, so they are washable and reusable and eventually biodegradable. The zippers are recycled from vinyl packaging, so are not cluttering a landfill somewhere. We have solar panels on our home that generate electricity which helps run my sewing machine and serger and the washer and dryer; we also have solar heated hot water used in pre-washing the fabrics.
Now -- what to do with all these bags -- I've got more than enough for my own use. I guess I'll have to start giving them away . . .
Now -- what to do with all these bags -- I've got more than enough for my own use. I guess I'll have to start giving them away . . .
See more images in my Google photo album: How to make Reusable Fabric Shopping Bags
edited: Jul-20+2022: replaced old picasa web album photos with current google photos and links


Comments
Post a Comment