Skip to main content
Search
Search This Blog
SewAmazin
blogging about sewing, machine embroidery, needlework, quilting . . . and a few other notions!
Home
About
Finished Projects
Keli's Korner FB Group
SewAmazin's Studio Blog
More…
Posts
Latest Posts
3/27/2021 05:21:00 PM
National Embroidery Month
12/31/2020 03:03:00 PM
White Scotty Dog Ornament In-the-Hoop
11/08/2020 01:41:00 PM
Let's Celebrate: Westie Counted Cross Stitch & No Sew Cube Finish
10/11/2020 01:33:00 PM
Friendship is a Gift to Share: Girl and Westie Cross Stitch
9/27/2020 01:49:00 PM
Finished: Winston the Westie Felt Plushie
9/20/2020 02:02:00 PM
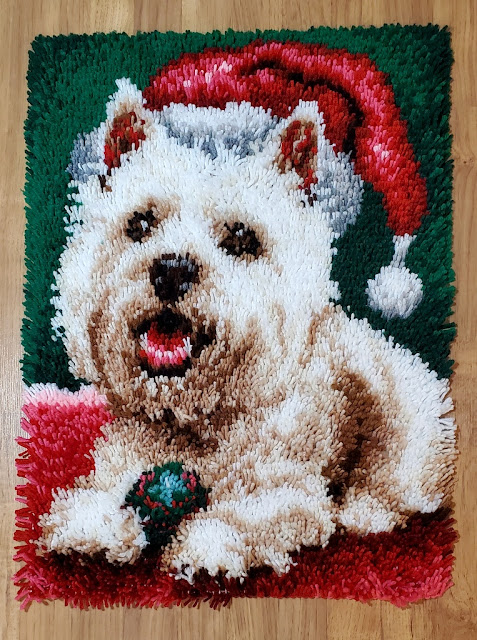
Christmas Puppy Latch Hook Rug Finished
9/13/2020 01:53:00 PM
Pansy, Clara and Henry O'Hare Stand up Figures
Older Posts