Me - a Quilter?
I've been saying for a long time that I'm not a quilter. That's because I believe it takes a lot of talent, effort and practice to do it well. I like to try lots of different techniques and so I usually choose projects where even a less than perfect attempt will result in a respectable finished product.
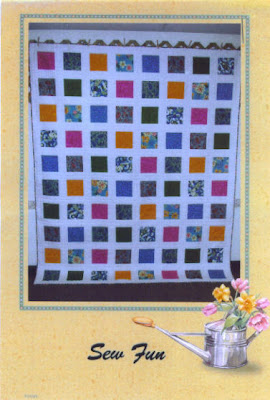
Last year I bought this Sew Fun quilt kit at one of the quilt shows, mainly because I liked the blue and green fabrics. I didn't really intend to make the quilt project at the time, but after staring at the sample photo for a long time, I thought maybe I would have to give it a try. It's just a bunch of simple squares, so how hard could it be? The piecing didn't intimidate me; the idea of quilting the finished project was the roadblock.
Around that time I happened to see an episode of Sewing With Nancy featuring "Cotton Theory" quilting, a method where you quilt the pieces individually, then join them together. I thought, I could probably do that, so I bought the book and DVD.
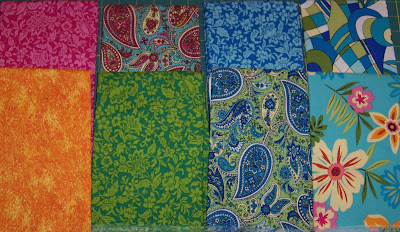
These RJR Sew You, So Fun fabrics were included in the Sew Fun quilt kit:


Now that the window valances are complete, I want to get the bed cover started, so decided to try making a single practice block to try the various joining techniques and work out any problems. I followed the directions for a kitchen trivet block, cutting the fabrics and doing all the quilting following the book's instructions exactly.
Well, almost exactly -- I did not match my thread to the fabric, so I could see the stitches (and all my mistakes) more clearly.
Now for the critique --
First, this block is not square. I trimmed one side shorter by mistake.
Second, I really, really, really don't like the grid-like quilting of the center square. It took too long and I don't think it's really necessary. This quilt will require about 80 blocks, and I don't want to spend 3 years on it. I'm looking at some embroidery designs intended for quilting blocks like this to help speed the process along.
Third, the side strips are channel quilted and even though I used a guide, the stitching is uneven and crooked. I'm not sure if it is because the strips were quite narrow or if I was sloppy. So at the least, on this step I definitely will need to match the thread to the fabric to hide my crooked stitching.
Fourth, I'm not going to add the corner triangles; they aren't necessary to my design.
Last, next time I'm going to try using the wash-away basting tape or glue stick to help keep the seams in place while stitching. Part of the reason a couple of front intersections are crooked are because I didn't take the time to pin them and as I stitched, the folded seams unrolled a little.
I do like the overall result, even the binding. The method of joining the pieces is not that difficult, and I think I can do a better job by taking a little more time. I knew I was making mistakes as I went along, I just didn't want to bother ripping them out, since this is just a learning piece.
Last year I bought this Sew Fun quilt kit at one of the quilt shows, mainly because I liked the blue and green fabrics. I didn't really intend to make the quilt project at the time, but after staring at the sample photo for a long time, I thought maybe I would have to give it a try. It's just a bunch of simple squares, so how hard could it be? The piecing didn't intimidate me; the idea of quilting the finished project was the roadblock.
Around that time I happened to see an episode of Sewing With Nancy featuring "Cotton Theory" quilting, a method where you quilt the pieces individually, then join them together. I thought, I could probably do that, so I bought the book and DVD.
These RJR Sew You, So Fun fabrics were included in the Sew Fun quilt kit:

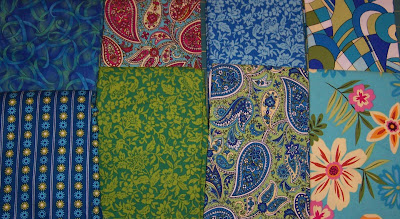
Most of these fabrics coordinate with the the new window valances I made for my master bed and bath; but I'm not too wild about the pink and orange. So I'm thinking of substituting some fabric from my stash:

There are still some bits of pink and orange, but I haven't decided yet whether to keep them or replace them.
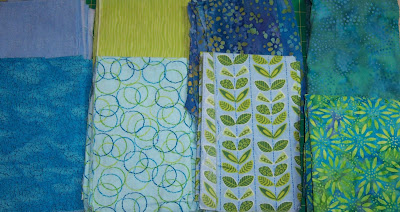
Since the quilt will be reversible, these are the fabrics I have planned for the back:
Since the quilt will be reversible, these are the fabrics I have planned for the back:

Now that the window valances are complete, I want to get the bed cover started, so decided to try making a single practice block to try the various joining techniques and work out any problems. I followed the directions for a kitchen trivet block, cutting the fabrics and doing all the quilting following the book's instructions exactly.
Well, almost exactly -- I did not match my thread to the fabric, so I could see the stitches (and all my mistakes) more clearly.
Now for the critique --
First, this block is not square. I trimmed one side shorter by mistake.
Second, I really, really, really don't like the grid-like quilting of the center square. It took too long and I don't think it's really necessary. This quilt will require about 80 blocks, and I don't want to spend 3 years on it. I'm looking at some embroidery designs intended for quilting blocks like this to help speed the process along.
Third, the side strips are channel quilted and even though I used a guide, the stitching is uneven and crooked. I'm not sure if it is because the strips were quite narrow or if I was sloppy. So at the least, on this step I definitely will need to match the thread to the fabric to hide my crooked stitching.
Fourth, I'm not going to add the corner triangles; they aren't necessary to my design.
Last, next time I'm going to try using the wash-away basting tape or glue stick to help keep the seams in place while stitching. Part of the reason a couple of front intersections are crooked are because I didn't take the time to pin them and as I stitched, the folded seams unrolled a little.
I do like the overall result, even the binding. The method of joining the pieces is not that difficult, and I think I can do a better job by taking a little more time. I knew I was making mistakes as I went along, I just didn't want to bother ripping them out, since this is just a learning piece.


Comments
Post a Comment