Friday, April 30, 2010

Ryan's Cars-Decorated Pillowcases and Gift Card Holder

Still catching up on posting projects; at least I'm working on the current year now!

Cars PillowcasesJanuary was my nephew Ryan's 3rd birthday. Have I mentioned that he is a fan of Disney's Cars??? Maybe once or twice ....

To go with his quilt and fleece pillow, I thought I'd embellish some purchased pillowcases with more bits and pieces of leftover Cars fabrics.  There were just enough fabric scraps to cut out a handful of characters.  I used leftover pieces of Steam-a-Seam light sheets to fuse the cutout characters onto the pillowcase side hem, then zig-zag stitched around the raw edges using invisible thread.

On one of the pillowcases I machine embroidered his name on the hem, using one of the fonts in 4D Embroidery.  I undid the seam first, so that the back of the embroidery would be hidden inside.

In addition to the pillowcases, we gave him a gift card which, of course, had to be wrapped in something special, so I made this gift card holder:
Gift Card Holder

It's a modified version of one of the designs included in Embroidery Library's In-the-Hoop Christmas Gift Card Holder design pack.  I used more leftover Cars fabrics and skipped the Christmas greeting steps of the embroidery design.  I remember putting a snap closure on the flap, which didn't go on perfectly straight, so the holder is a bit wonky.  But I don't think Ryan minded a bit.

Monday, April 26, 2010

Stitch N' Pitch 2010 at Citi Field: Setting a World Record

The Mets' 4th Annual Stitch N' Pitch event is scheduled for Saturday, June 5, 2010 @ 4:10 pm vs. Florida Marlins. At this year's event, they are attempting to break a Guinness World Record for the most people crocheting simultaneously.(see these links at the Craftzine.com blog, and Crochet Today blog)

I am not fond of the Marlins, especially after the last game at Shea in 2008; however since I do sometimes work with yarn, I'm planning on attending this year and hoping to round up a few other crocheters. I just need to find a good blue and orange project to work on that won't end up a UFO.

The Group Ticketing page at Mets.com contains info about this year's event at Citi Field. The ticket price for Promenade Reserved seating is $19 and all participants will receive a Mets Skyline Keychain and a limited number will receive a special edition Stitch N' Pitch bag (with advance ticket purchase). FYI, we paid $19 for parking at one of the Citi Field lots earlier this month.

For more information about the Guinness World Record part of the event, read or download this PDF file from Stitch N' Pitch.

Briefly, anyone wishing to participate must:
• Purchase a Mets Stitch N’ Pitch ticket – details at www.StitchNPitch.com
• Let them know you will be attending – RSVP to Guinness@StitchNPitch.com
• Arrive early - gates open at 1:30PM.
• Check in outside Section 531 to receive your complimentary crochet hook and yarn.
• Be seated no later than 2:00PM in Section 531 with crochet hook and yarn.
• Guinness Record event will start promptly at 2:15PM
• Crochet for at least15 minutes non-stop in order to set the record!
*****


From the Stitch N' Pitch home page:   What is Stitch N' Pitch?
Stitch N' Pitch brings together two wonderful traditions — Baseball and the NeedleArts. Come to a ball game and knit, crochet, embroider, cross-stitch and needlepoint. Sit among friends, family and colleagues and cheer on your favorite Baseball Team. Beginners, intermediate and experts are all welcome."
Most of the emphasis is on knitting and crochet, which makes sense since most projects using these techniques are very portable, and TNNA, the force behind this program, is a trade organization for professionals in the knitting, crochet, cross stitch, embroidery, needlepoint and embellishment industries.


More general information about Stitch N' Pitch:


    Saturday, April 24, 2010

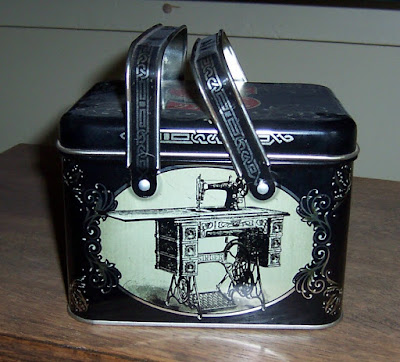
    Another Vintage Treasure

    Since I haven't been sewing anything new lately, I thought I'd share a recent addition to my collection.

    Earlier this year I found this tin at the Scranberry Coop:
    Antique Singer Sewing Machine Tin

    The image of the antique Singer sewing machine looks exactly like the machine I inherited, right down to the detail on the drawers of the cabinet.


    The tin itself looks old, but there are no rust spots, scratches or other blemishes, so I doubt it is an antique.
    Antique Singer Sewing Machine Tin

    Perhaps I should have dusted it before photographing. :-)
    Antique Singer Sewing Machine Tin

    I haven't had much luck identifying the original purpose of this tin or what it may have contained; if anyone has information about when and where it was originally distributed, please leave a comment.

    Sunday, April 18, 2010

    Still Playing Catch-up - Christmas 2009

    In my last entry I attempted to catch up on posting about my projects for 2009 through November. 

    I'm behind in posting because last November we started renovation of our kitchen and the project restricted access to my office and desktop computer. The kitchen was finished in January, and since then I've been spending my time cleaning up, unpacking and reorganizing.  I'm still not back to sewing every day, but visiting my blog and trying to get caught up is beginning to inspire me -- after all, the kitchen needs new window treatments ....

    Anyway - in this post I'll cover all the sewing projects I finished for Christmas gifts. Usually I prefer to write about one project per posting, so I can note specific details about the materials used in a project or the particular challenges encountered, but since I worked on these nearly 5 months ago, I'm combining them in one posting. There are a lot of photos in this entry, but I've tried use a few of the best shots for each item.  There are more photos of all of these projects in my 2009 Sewing & Crafting Set on Flickr.

    Day 1 of kitchen demolitionAbout a month before the kitchen remodel was scheduled to begin, a good amount of my time was split between packing boxes of dishes and food and setting up the temporary kitchen in the basement and organizing my sewing area, pre-washing, cutting and organizing as many sewing projects as possible.  While the guys were downstairs tearing down walls and reconstructing my kitchen, I was upstairs sewing and keeping Keli and Penny out of their way.

    Let's start with RJ's Nursery Rhyme Crib Quilt & Soft book.  Fabric panels of 6 old-fashioned Mother Goose nursery rhymes (Faye Whittaker for Elizabeth's Studio pattern #1443) were the inspiration for this quilt. I didn't want to repeat any of the panels so chose to alternate blocks of the nursery rhymes with humpty dumpty fabric on a yellow background (Faye Whittaker for Elizabeth's Studio pattern #1446)

    Nursery Rhyme Quilt

    The panels, yellow humpty dumpty and blue sashing fabrics were all purchased at The Cozy Quilt Shoppe.  Later, I found the humpty dumpty design on a blue background at one of the quilt shows. The backing fabric has the nursery rhymes all over (Faye Whittaker for Elizabeth's Studio pattern #1444).

    I used Nature-Fil bamboo batting from Fairfield on this and on Ryan's Cars quilt; it's made with 50% bamboo fiber and 50% organic cotton batting. Before assembling the quilt, I prewashed and dried the batting.

    Nursery Rhyme Quilt

    For quilting, I stitched in the ditch using a matching thread around each block and along the sashing and borders. It didn't look finished so I added some wavy lines using Superior Threads' King Tut #986-Alexandria on the horizontal sashing.

    For the outer border, I searched through the motifs in Follow The Lines Quilting Designs, Volume 2 before finding this design, called Deviled Eggs, which seemed appropriate. I traced the design onto Sulky Solvy, used temporary adhesive spray to fix it to the quilt, then set up the Fab-U-Motion for some semi-free motion quilting. Some areas are smoother than others, but overall, it turned out pretty well and it was fun. But I definitely need much more practice.

    Nursery Rhyme Quilt

    The quilt binding is sewn on by machine using a blanket stitch and the King Tut variegated thread.

    Nursery Rhyme Soft Book

    For the matching soft book, I used each one of the fabric panels padded with leftover pieces of fusible batting and some scraps of the humpty dumpty fabrics for backing. I ended up with 3 finished page layers that were sewn down the center spine (I omitted some of the batting in that area to reduce the bulk a tiny bit).

    Nursery Rhyme Soft Book


    The next project is my nephew Ryan's Cars Quilt.  Actually, I worked on this one first, but it was less complicated to piece and quilt than RJ's quilt.

    Cars Quilt

    I had a bunch of Cars fabrics left over from a quilt I made for my nephew, William back in 2007 and since Ryan is such a fan of Lightning McQueen, I thought this would be a good stash-busting project. The quilt design is from BH&G's Quilts and More magazine, Winter 2008 issue. The pattern is a simple design of 10 inch squares arranged in 6 rows and 6 columns. I used the same design for my niece Lauren's purple quilt last summer (I wrote about that one here).

    Cars Quilt

    I didn't have quite enough of the Cars fabrics to make all 36 squares, so I filled in with prints of vintage Corvettes and other cool cars from JoAnn Fabrics.  The backing fabric is all flames and reminds me of Hot Wheels. This one was quilted simply in long diagonal lines across the blocks.

    Cars Quilt


    Lauren's Pillow Sham is based on a similar purchased pillow sham and was another stash-busting project. I used scraps of purple fabrics left over from her purple quilt (see a slideshow of it here), made for her birthday last summer.

    Pillow Sham

    The front of the sham is cut from a remnant piece of matelasse and the purple fabrics were pieced in a scrappy border. The back was made of a single fabric with button closures.

    Pillow Sham

    Of course, the pillow sham needed a coordinating personalized pillow case. I don't think Lauren could ever get too much purple.
    Embroidered pillowcase

    And last, but not least, this in-the-hoop gift bag was a quickie and contained some chocolates, a gift card and an IOU, since I had run out of time. The embroidery designs for the poinsettia and bag are both from Embroidery Library. I used a blank gift bag design combined with Positively Poinsettia from A Wispy Wonders Christmas design pack. The fabric is a metallic cotton from my stash.
    Gift Bag

    ***********

    Now we're caught up through the end of 2009; I have a few new projects for 2010 to share, but those will have to wait for another day.

    Wednesday, April 7, 2010

    Catching up - Sept/Oct 2009

    Well, it looks as if the last time I recorded a finished project here was back in August 2009 ... I can't believe it's been that long!  I'm going to try to catch up a couple of projects at a time.

    First up, some gifts for my newest nephew, RJ, born late last September.  I made a couple of diaper burp cloths, bibs and minkee and flannel blankets.  One set featured sea turtles:

     Gifts for Baby RJ

    Gifts for Baby RJ Gifts for Baby RJ
    The initials are machine embroidered appliqués and the starfish and sea turtle embroidery designs are from Embroidery Library's Baby Nursery Design Pack.  They may look familiar; I've used them on other baby items.

    I forgot to take photos of the second set, but the fabrics I used are below:

    Gifts for Baby RJ

    For the second set, I scanned the turtle, enlarged the image and then used it as a pattern to make an appliqué stitched onto a pre-made bib.  I thought it turned out really nice, and really wish I'd remembered to take a photo!


    In October, I worked on a cape for me - New Look 6658:
    New Look 6658 Cape

    Luckily, I wrote a review on PatternReview.com shortly after I finished this one, because I don't remember all the details now. To see more photos of the cape, visit my Garments Set on Flickr.

    Here's a recap of my review:
    Pattern Description: Pattern envelope includes a lined Cape with or without collar and toggle closures as well as a vest, scarf, hat and bag

    Pattern Sizing:  I made size 12 to fit my narrow shoulders. Normally, I'd start with a 14 or 16 to fit bust.

    Did it look like the photo/drawing on the pattern envelope once you were done sewing with it? I made the cape View A with the collar and toggle closures and yes, it looks very much like the photo.

    Were the instructions easy to follow? This was my first experience with a New Look pattern; the instructions seem a little less detailed than some other brands. They were concise and logical in the order of construction.

    What did you particularly like or dislike about the pattern?
    Like: I really like that the only area I needed to fit well was in the shoulders.
    Dislike (minor): the pattern calls for toggle closures but does not include instructions for making them. I could only find knotted frog closures locally, so had to figure out a way to make my own toggle closures.

    Fabric & Supplies Used:
    Polyester/Rayon blend woven tweedy fabric from JoAnn Fabrics' Indian Summer "collection", I used the 'wrong' fuzzier side of the fabric as my 'right' side, so it looks a bit wooly. I opted to use Brown Zeus lining and I'm so happy I decided to use this instead of a lighter weight lining.

    The closures were made from purchased wood toggle buttons, loops were recycled cording saved from Bare Escentuals shopping bags, and the 'appliqués' (or whatever they are called) are faux leather. close up of closures

    Pattern alterations or any design changes you made:
    I measured the pattern waist and lower edge circumferences before cutting and found the difference between size 12 and the largest size 18 was less than 2 inches, so decided to test the size 12 in muslin. The shoulders fit nicely but I lowered the arm openings about 1.5 inches which felt more comfortable.

    I'd like to add a button-on hood if I can find the time -- I'd have to copy a hood from one of my RTW coats for size and placement, though.

    Conclusion:
    Overall I'm really happy with the way the cape turned out. This is my first attempt at real outerwear, and I consider this somewhat of a practice piece before attempting a coat.

    I don't know if capes are in or out of fashion right now; I made this one to have something a little nicer for running errands and quick and easy to put on when I have to take out my two terriers on a chilly day. For really cold weather, this would need a heavier lining/underlining (or a big sweater).

    At the end of October, I worked on this mini quilt, Westie Halloween Treats:
    Westie Halloween Treats

    The pattern for this appliqué mini quilt can be found at FreePatterns.com; the link can be found on my Westie Quilt Pattern Links page. The original design features a Scottie and Chihuahua, but I made a few changes so that they resemble my Westie and Wauzer, Keli and Penny. 

    The larger dog pulling the wagon is Keli, and I added a black button for her eye.  The smaller dog is Penny; her nose is another button and her eyeball is a french knot. I digitized and machine embroidered the text on the moon and side of the wagon. The pile of bones in wagon includes a few ceramic bone buttons from my stash. The yellow circles on the wheels and Keli's hat are fabric yo-yo's. Each appliqué piece was fused to the background with Steam-a-Seam light, then blanket stitched around the edges by machine. I quilted in the ditch along the borders. The details are visible on the original size image.

    *********
    That catches me up through October 2009; in November we began the kitchen remodel, so I was only able to work on a few other items for Christmas.  I'll include those in my next post.
    Related Posts Widget for Blogs by LinkWithin