It's a Pajama Party
Not really a party, just a theme for March and April . . .
Our niece Jenna's birthday was in March and as her gift, we decided to offer her a weekend visit to introduce her to sewing. Jenna aspires to be a designer someday, so knowing how to construct a garment is important. I chose the pajamas for a project because I wanted her to really learn how to make something practical and be challenged, while being able to finish it in a day.
Friday night we set up her sewing machine, her mom's Kenmore, so that she could learn how to use it, since that's what will be available to her at home. It's a good basic machine; I was very thankful that the user manual was available to show me how to put in the bobbin, because it was different from any machine I've ever used - it was vertical and all my machines have had horizontal drop in bobbins.
 Our plan was to go shopping at my local JoAnn Fabrics on Saturday to get a pattern and any other notions. Since the McCall's patterns were on sale that week, I had done a little pre-shopping online for pattern ideas and also printed out sizing charts and instructions on how to take measurements. We took Jenna's measurements and decided she needed a girls pattern in size 10 or 12.
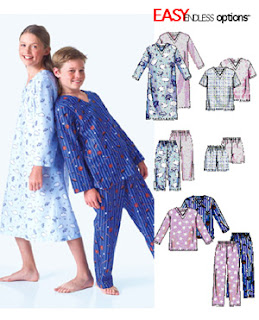
Jenna had never been inside a fabric store before, so we took a few minutes to look at the variety of fabrics and other items available. It was a lot for her to take in at once. We made our way back to the pattern area and looked through the catalogs to find pajamas. We chose two patterns, McCall's 4291 (left) and 5744 (below) which both have simple elastic waisted pajama pants in multiple sizes. Both patterns have tops which hopefully we'll make sometime in the future.
Our niece Jenna's birthday was in March and as her gift, we decided to offer her a weekend visit to introduce her to sewing. Jenna aspires to be a designer someday, so knowing how to construct a garment is important. I chose the pajamas for a project because I wanted her to really learn how to make something practical and be challenged, while being able to finish it in a day.
Friday night we set up her sewing machine, her mom's Kenmore, so that she could learn how to use it, since that's what will be available to her at home. It's a good basic machine; I was very thankful that the user manual was available to show me how to put in the bobbin, because it was different from any machine I've ever used - it was vertical and all my machines have had horizontal drop in bobbins.
 Our plan was to go shopping at my local JoAnn Fabrics on Saturday to get a pattern and any other notions. Since the McCall's patterns were on sale that week, I had done a little pre-shopping online for pattern ideas and also printed out sizing charts and instructions on how to take measurements. We took Jenna's measurements and decided she needed a girls pattern in size 10 or 12.
Jenna had never been inside a fabric store before, so we took a few minutes to look at the variety of fabrics and other items available. It was a lot for her to take in at once. We made our way back to the pattern area and looked through the catalogs to find pajamas. We chose two patterns, McCall's 4291 (left) and 5744 (below) which both have simple elastic waisted pajama pants in multiple sizes. Both patterns have tops which hopefully we'll make sometime in the future.

After we selected the patterns, we shopped for thread and a few other notions. We didn't need fabric because we were planning to use flannel from my stash. While we were shopping, Jenna carefully selected a sewing basket to keep track of her supplies; we examined several sizes and shapes and chose one in her price range that would accommodate her new collection of scissors, pins, thread, etc., with room to store more in the future.
Finally we were read to get started. Back at home, we prepared the pattern pieces, chose a cutting layout, started pinning the pattern pieces to the fabric, cutting them out and sewing them together. Jenna did most of the work -- I demonstrated each step along the way and then let her finish, and she did a great job.

and pressing some seams:

When it was time to sew the hems, she used my sewing machine because we could really slow it down, making it easier for her to stitch:

We started our day at 10am with our shopping trip and worked all day until 10pm, stopping every hour or so and for lunch and dinner and by the end of the day, the pajamas were finished:

Jenna did a great job for her first time sewing. She even wore the pants to bed that night. And when we visited a week later, she showed us a pair of pajama pants she made for her brother Jack (with some help from her mom). And I hear she has plans to make pajamas for quite few more members of her family. I'm sending her an old OOP McCall's pattern to use for the adults.
You can see more photos in Jenna's Sewing Weekend Flickr Set.
The flannel we used for Jenna's pajama pants has been in my "collection" for probably 8 or 9 years. I don't know what I was thinking when I bought it, because it's all pink, which I hardly ever wear and is likely why I never used it until now.
Last year I bought a lot of knit fabrics in blues and greens that I wanted to use to make pajamas for myself. So I decided I'd use the remaining pink flannel in place of muslin to try out some of the patterns and make fitting adjustments. Yes, I realize the knits will fit a little differently than the woven flannel, but the basic measurements should be close.
Finally we were read to get started. Back at home, we prepared the pattern pieces, chose a cutting layout, started pinning the pattern pieces to the fabric, cutting them out and sewing them together. Jenna did most of the work -- I demonstrated each step along the way and then let her finish, and she did a great job.
Here she is pinning away:

and pressing some seams:

When it was time to sew the hems, she used my sewing machine because we could really slow it down, making it easier for her to stitch:

We started our day at 10am with our shopping trip and worked all day until 10pm, stopping every hour or so and for lunch and dinner and by the end of the day, the pajamas were finished:

Jenna did a great job for her first time sewing. She even wore the pants to bed that night. And when we visited a week later, she showed us a pair of pajama pants she made for her brother Jack (with some help from her mom). And I hear she has plans to make pajamas for quite few more members of her family. I'm sending her an old OOP McCall's pattern to use for the adults.
The flannel we used for Jenna's pajama pants has been in my "collection" for probably 8 or 9 years. I don't know what I was thinking when I bought it, because it's all pink, which I hardly ever wear and is likely why I never used it until now.
Last year I bought a lot of knit fabrics in blues and greens that I wanted to use to make pajamas for myself. So I decided I'd use the remaining pink flannel in place of muslin to try out some of the patterns and make fitting adjustments. Yes, I realize the knits will fit a little differently than the woven flannel, but the basic measurements should be close.
 My first pattern is Simplicity 3928 (which appears to be out-of-print now). The pajama pants are pretty straightforward and my first pair fit well enough. I made only the pants for my first sample -- the fabric makes me think of old fashioned table cloths, but they are good enough for sleeping in. (I don't have a photo yet, but will add it to Flickr if I remember to take one.)
They were a little long and baggy in the legs and the back waist felt a little low, so I added an inch to the pattern height at the center back and tapered to nothing at the side seams for the next pair of pants.
For the second trial pj's I also tried making the top, View B. It turned out okay. It wasn't too
 terribly difficult to make, but I don't much care for this style now, so probably won't be making any more.
I am NOT going to share the back view of these pajamas in my blog, but if you really want to see the photo, you can look here.
I think I need to make some sort of adjustment to the pattern for the excess bagginess in the back of the top -- definitely need to add some room at the hemline, but I'm not sure what to call the back adjustment. I've had this type of gapping on the other blouses I attempted a year or so ago, so it's definitely something I need to address.
 Well, I'm ready to move on to working with some of the knits in my stash and I 'd like to try another out-of-print pattern in my stash, Simplicity 5877. It looks like the pants are made with seams only at the inside leg and center. These could be great or a disaster, but at least with a knit they'll be stretchy. And blue-ish.
And, um, in case you were wondering, no I won't be making the short version of the top that the model is wearing, I'll attempt the longest version with the long sleeves. Maybe.
I think I need to make some sort of adjustment to the pattern for the excess bagginess in the back of the top -- definitely need to add some room at the hemline, but I'm not sure what to call the back adjustment. I've had this type of gapping on the other blouses I attempted a year or so ago, so it's definitely something I need to address.
 Well, I'm ready to move on to working with some of the knits in my stash and I 'd like to try another out-of-print pattern in my stash, Simplicity 5877. It looks like the pants are made with seams only at the inside leg and center. These could be great or a disaster, but at least with a knit they'll be stretchy. And blue-ish.
 And, um, in case you were wondering, no I won't be making the short version of the top that the model is wearing, I'll attempt the longest version with the long sleeves. Maybe.
edited:
Nov-25-2018 Replace SewAmazin Flickr photos (Jenna) with upload to Blogger; edit links


Comments
Post a Comment