Slipcover Progress: Putting it together
Last time, I had cut and pin-fit all the sections of the slipcovers, but didn't have any photos to share. Here are a few photos of the pin-fitting progress:
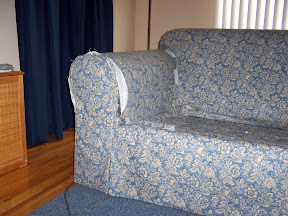
left inside arm; right arm front, with piping attached and pre-finished skirt:
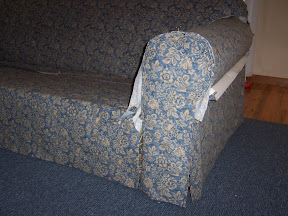
right outside arm - pre-finished skirt:
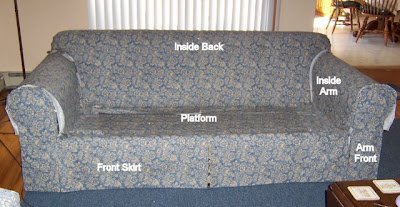
the whole thing pin-fitted:
Finally, I was ready to start pin-basting and putting the slipcover together.
Starting with the inside back, platform and front skirt sections, I pin-basted the sections together along the intended seam line. I used a water soluble pen to mark the pinned seam, then sewed the sections together. The seam that joins the inside back and platform sections allows a 5-6 inch "tuck-in"; the seam is not sewn tightly into the corner but instead leaves this extra fabric for ease. It is tucked in between the space between the couch's upholstered inside back and platform area when fitting the slipcover to the sofa.
The next sections pin-basted were the inside arms to the inside back and platform. I allowed a tuck-in allowance between the inside arm and platform for fitting. Sewing these two seams was a bit of a challenge, because I wanted to leave enough ease for the tuck-in areas while making sure the seams met in the intersection of the three areas. I had to make a few alterations, but eventually, it all worked out. After sewing each section, I tested the fit on the couch before trimming and clipping the seams, then moving on to the next section.
The original couch upholstery features "faux box pleats" -- instead of real box pleats, there are are series of underlay sections stapled to the frame of the couch; the upholstered cover has skirted sections that lay over these sections and give the appearance of box pleats (see my previous blog entry). My new slipcover is mimicking this effect.
To achieve the look of the faux box pleats, the front skirt sections as well as the outside arm, arm fronts, underlays and back are all pre-finished lined units that needed to be assembled before pin-basting or sewing. For most of these sections, I used a heavy weight muslin for the lining and mitered the corners.
To make each unit, I cut the muslin lining one inch shorter on 3 edges - the two side seams and the bottom. I sewed with a 1/2 inch seam allowance along the two side seams, aligning the top edges and stopping 1/2 inch from the bottom of the lining. Then they were turned right side out and pressed so that the front wrapped around the back by 1/2 inch on each side.
Starting with the inside back, platform and front skirt sections, I pin-basted the sections together along the intended seam line. I used a water soluble pen to mark the pinned seam, then sewed the sections together. The seam that joins the inside back and platform sections allows a 5-6 inch "tuck-in"; the seam is not sewn tightly into the corner but instead leaves this extra fabric for ease. It is tucked in between the space between the couch's upholstered inside back and platform area when fitting the slipcover to the sofa.
The next sections pin-basted were the inside arms to the inside back and platform. I allowed a tuck-in allowance between the inside arm and platform for fitting. Sewing these two seams was a bit of a challenge, because I wanted to leave enough ease for the tuck-in areas while making sure the seams met in the intersection of the three areas. I had to make a few alterations, but eventually, it all worked out. After sewing each section, I tested the fit on the couch before trimming and clipping the seams, then moving on to the next section.
The original couch upholstery features "faux box pleats" -- instead of real box pleats, there are are series of underlay sections stapled to the frame of the couch; the upholstered cover has skirted sections that lay over these sections and give the appearance of box pleats (see my previous blog entry). My new slipcover is mimicking this effect.
To achieve the look of the faux box pleats, the front skirt sections as well as the outside arm, arm fronts, underlays and back are all pre-finished lined units that needed to be assembled before pin-basting or sewing. For most of these sections, I used a heavy weight muslin for the lining and mitered the corners.
To make each unit, I cut the muslin lining one inch
 shorter on 3 edges - the two side seams and the bottom. I sewed with a 1/2 inch seam allowance along the two side seams, aligning the top edges and stopping 1/2 inch from the bottom of the lining. Then they were turned right side out and pressed so that the front wrapped around the back by 1/2 inch on each side.
To make the mitered corners and sew the bottom seam, I turned the unit so that the wrong side faced out and pinched the corner of the longer front fabric to form a triangle. Turning and folding the triangle away from the side seam pulled the bottom of the front and back fabrics even with each other:
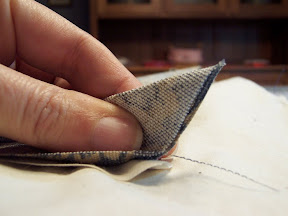

I pinned the bottom seam and stitched between the side seams, using a 1/2 inch seam allowance:

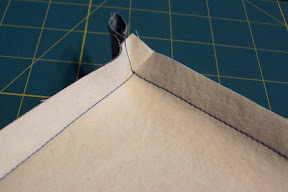
I turned the triangle out to the side again and stitched it flat and trimmed off about one square inch:

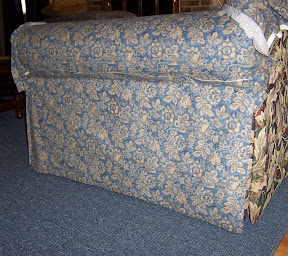
Last, I turned the unit right side out and poked the corners until they were just right and the seams inside were nice and flat, then pressed the corners and seams really well. Here's a peek at a couple of the finished underlay sections:

I continued pin-basting and sewing all the sections of the couch except for the back, then tested the fit again, tucking in all the seams where necessary:

Here's a close-up of the left inside arm area and Keli inspecting the fit of the right outside arm (underlays are pinned in place):

Finally, I pin-fitted, basted and sewed the back section:
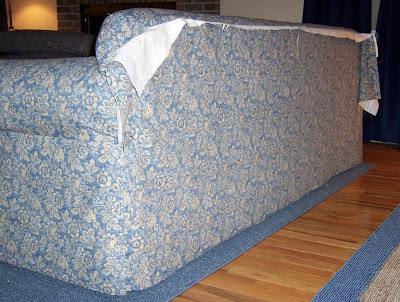
The curves of the back seam where not easy to line up correctly on my first pass and need to be adjusted a little. There's a little too much fullness and the tucks are not as tight as I'd like, so I need to re-stitch some sections. I've pinned the adjustments below:


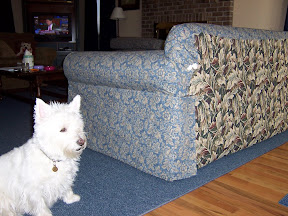
Before making any further adjustments, I wanted to see how everything looked with all the cushions in place to check for any gaps or pulls:

The pillow is borrowed from another room; but so far I'm rather pleased with the overall result. I need to do a little more tweaking on the back and add a few final touches, but this project is about 95% complete!
Pin-basting and sewing took me three days - Sunday through Tuesday. I should have the final adjustments finished by Friday.
Next time I'll share a few finishing touches before wrapping up this project.
Pin-basting and sewing took me three days - Sunday through Tuesday. I should have the final adjustments finished by Friday.
Next time I'll share a few finishing touches before wrapping up this project.


Comments
Post a Comment