Hankie Blankie - Blue Puppy Finished!
Last week I finally finished digitizing the puppy face to my satisfaction. So, at long last it was time to embroider the faces and finish sewing the actual hankie blankies. I had ordered the minkee dotted and smooth in blue almost a year ago, so it was all ready to be cut out for the head, paws and blankies. I decided to embroider 3 faces; one for each new nephew and one "extra" -- either for a model, a future gift, or who knows?
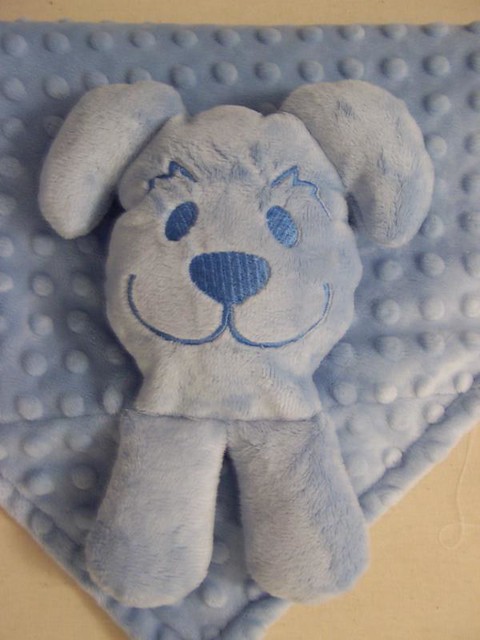
Here's a close-up of the finished blankie (this one went to Ryan):
I should be able to finish sewing the other two puppy blankies by the end of this week, and next I have a new minkee project to work on for July/August -- but it's still under wraps for now.
..................................................................................
Credits: Hankie Blankie Pets designed by Judy Reynolds/Black Cat Creations
..................................................................................
Read my previous post about this project


It looks so cute!!!! Could you let me know how much minkee you need in order to make one, I have some minkee leftovers from quilting project of mine and I love making one for my son.
ReplyDeleteThis is a fun project and the little ones just love the soft minkee!
ReplyDeleteThe pattern calls for 1/2 yard of 60 inch wide fabric if it is all one color. If using two colors, 1/2 yard solid minkee and 18 inches of dotted. For 42 inch wide fabric, 2/3 yard are needed.
Since you are using leftover pieces, this may be more helpful:
For the head, you will need 8"x18" and for the paws, 10"x 3.5" (which will be cut down to individual pieces)
For the blanket, you will need two 15"x15" squares, plus an additional triangle for the top corner seam where the head and paws are attached - a 9" or 10" square should be enough.
Because you have worked with minkee before, you probably know how slippery it can be to stitch . . . I used a dual feed foot (walking foot) on my machine and at least 1/2" seam allowance or more. Also some lightweight tear-away stabilizer underneath when I basted the head and paws to the blanket top, helped A LOT! A little temporary adhesive spray helps keep the pieces from shifting while sewing, too.
Good luck and have fun!